Leveraging AI For Self Storage Images

High quality imagery is a fundamental part of any self storage website. You can say the right things on your website, but if you aren’t backing your words up with photos and graphics that visually communicate what your visitors need to see in order to make a decision about storing with you, then you’re likely shooting yourself in the foot. The good news is it is easier, and cheaper than ever to get great images for your website. AI tools, like Midjourney, enable you to generate realistic images in minutes with just a few words.
In this guide, we’ll explain exactly how to use Midjourney to do just that. But we’ll first explore what imagery your potential customers want to see to establish where it makes sense to use AI imagery and when it doesn’t.
What do self storage customers want to see?
The experience of self storage is a real world one. It involves someone visiting a location and trusting strangers with their belongings. Because of this, it’s important you have imagery on your website which gives potential customers peace of mind, helping them to see you’re a real trusted business and a perfect fit for their needs.
Ideally, your imagery will help:
Establish trust
Give a sense of security
Showcase ease and convenience
Show a well-maintained, clean facility
Show the storage options you have available
Highlight your reputation
Highlight satisfied customers
With these points in mind, do you think AI generated images can effectively communicate any of this as well as real photography shot at your facility? The answer (at least today) is definitely not. There’s no AI shortcut here.
The first thing you should do instead is get amazing self storage photography shot at your facility, then add it to across your website. You can do this yourself if you want, but unless you’re a skilled photographer, a one-off investment in a professional is recommended to stand the best chance of your website imagery sealing the deal for visitors.
Should you use AI imagery at all?
There is an argument to be made that AI images don’t make sense for business that are so rooted in the real world, like self storage. However, we believe there is still potential here for AI to help with less specific imagery for your website. If you’re properly investing in your website as your number one sales person, then you likely have a constant flow of new content which will need visuals to help with engagement. You could pay for a photographer every time, but for most that’s not financially viable. You also could buy stock photography, but that’s limited to the same set of images everyone else is using, and there isn’t a crazy amount of self storage stock photography about.
This is where AI imagery can make a lot of sense on your self storage website. It’s cheap, quick and can output fairly unique images which match your content. Say, for example, you want to create a web page to target business customers. AI can create you an image showing an office overflowing with documents in the need of storage.
Or if you’re writing a blog article about moving home. Get Midjourney to generate images of moving vans and packing up boxes at home.
These less specific use cases are much more in the wheelhouse of AI today, and you can absolutely leverage them to help. In this guide, we’ll show you how to use Midjourney to generate images like these. We’ll show you exactly how to:
Create your account and get started
Write prompts and iterate on images until you’re happy with the outcome
Add your AI generated images to your website
Step 1: Getting set up with Midjourney
Midjourney is interacted with via Discord, which is a community chat application. To use it, you’ll be signing up to Discord and joining the Midjourney community.
To start, visit midjourney.com and press Join the Beta. Follow the instructions to create your Discord account. Once you’ve verified your email, you’ll have access to Discord and Midjourney. From here, make sure you’ve selected Midjourney from the sidebar. What you’ll encounter may seem a little overwhelming, but it doesn’t have to be. Go to the sidebar and select any Newcomer room, each will start with #newbie. Once in a room, type /subscribe and send the message. You’ll see a message appear in the chat with a button to Manage Your Account. Press this, and you will be taken to Midjourney to set up a subscription. You can use Midjourney from just $8 per month, and that’s usually enough to generate at least 100 images.
Step 2: Generate your first self storage image
Now that you’re subscribed, return to the #newbie channel and type /imagine. This is the command which tells the Midjourney Bot that you want to generate an image. You will follow /imagine with a description of the image you want to create. For example, it can be as simple as:
/imagine a family moving house
First image options generated
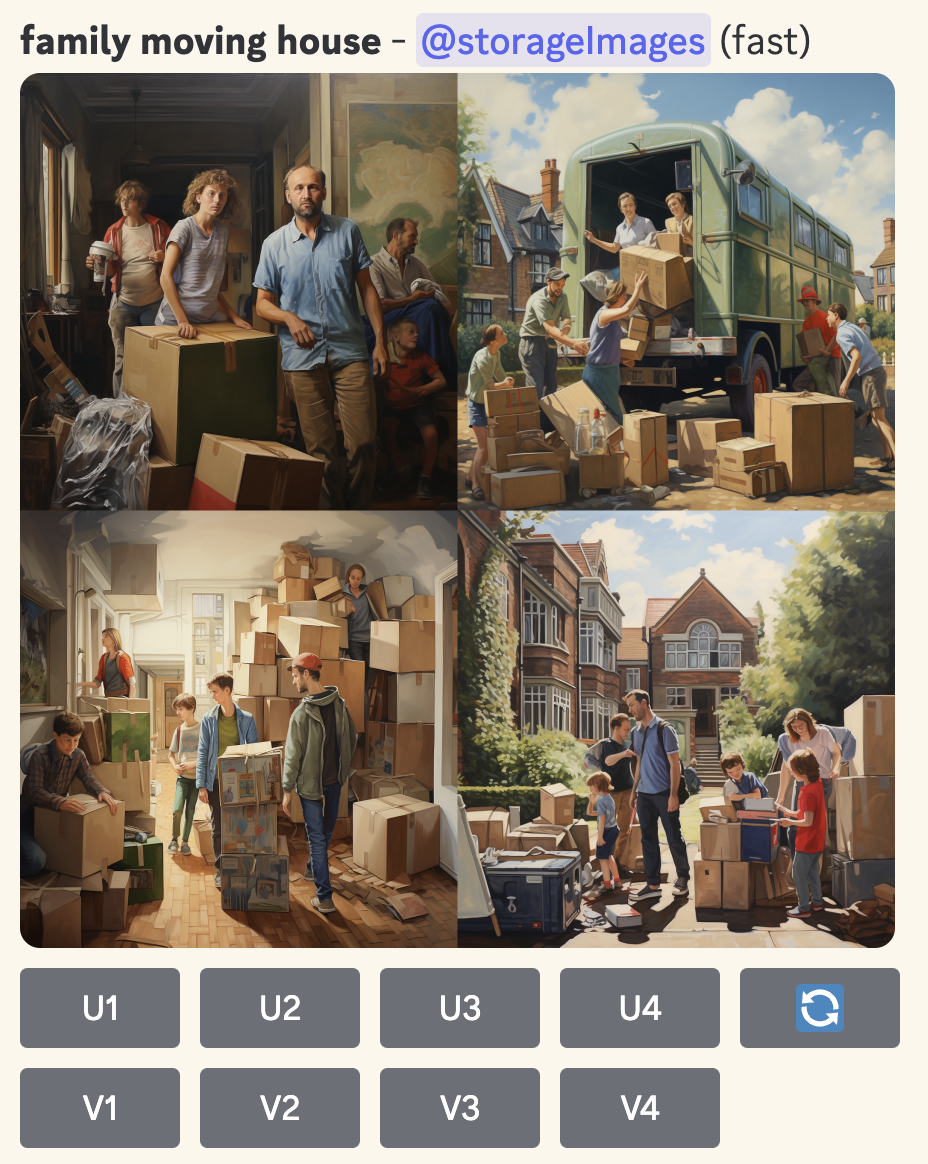
Here’s what the Midjourney bot generated for me in just a few seconds based on this basic prompt. It will always generate 4 options for you. You can select one and have Midjourney iterate on it, or if you’re not happy, try writing a new prompt.
You can see already these certainly are images of a family moving house. But there are also some issues. Style wise, they aren’t quite as realistic as I’d like. They’re also square, I’d prefer a 16:9 ratio.
Thankfully, we can get much more specific with our prompt in order to generate options more closely aligned to what we want. Let's try the following prompt, which asks it make a more realistic image in a 16:9 ratio:
/imagine a family moving house, photorealistic --ar 16:9
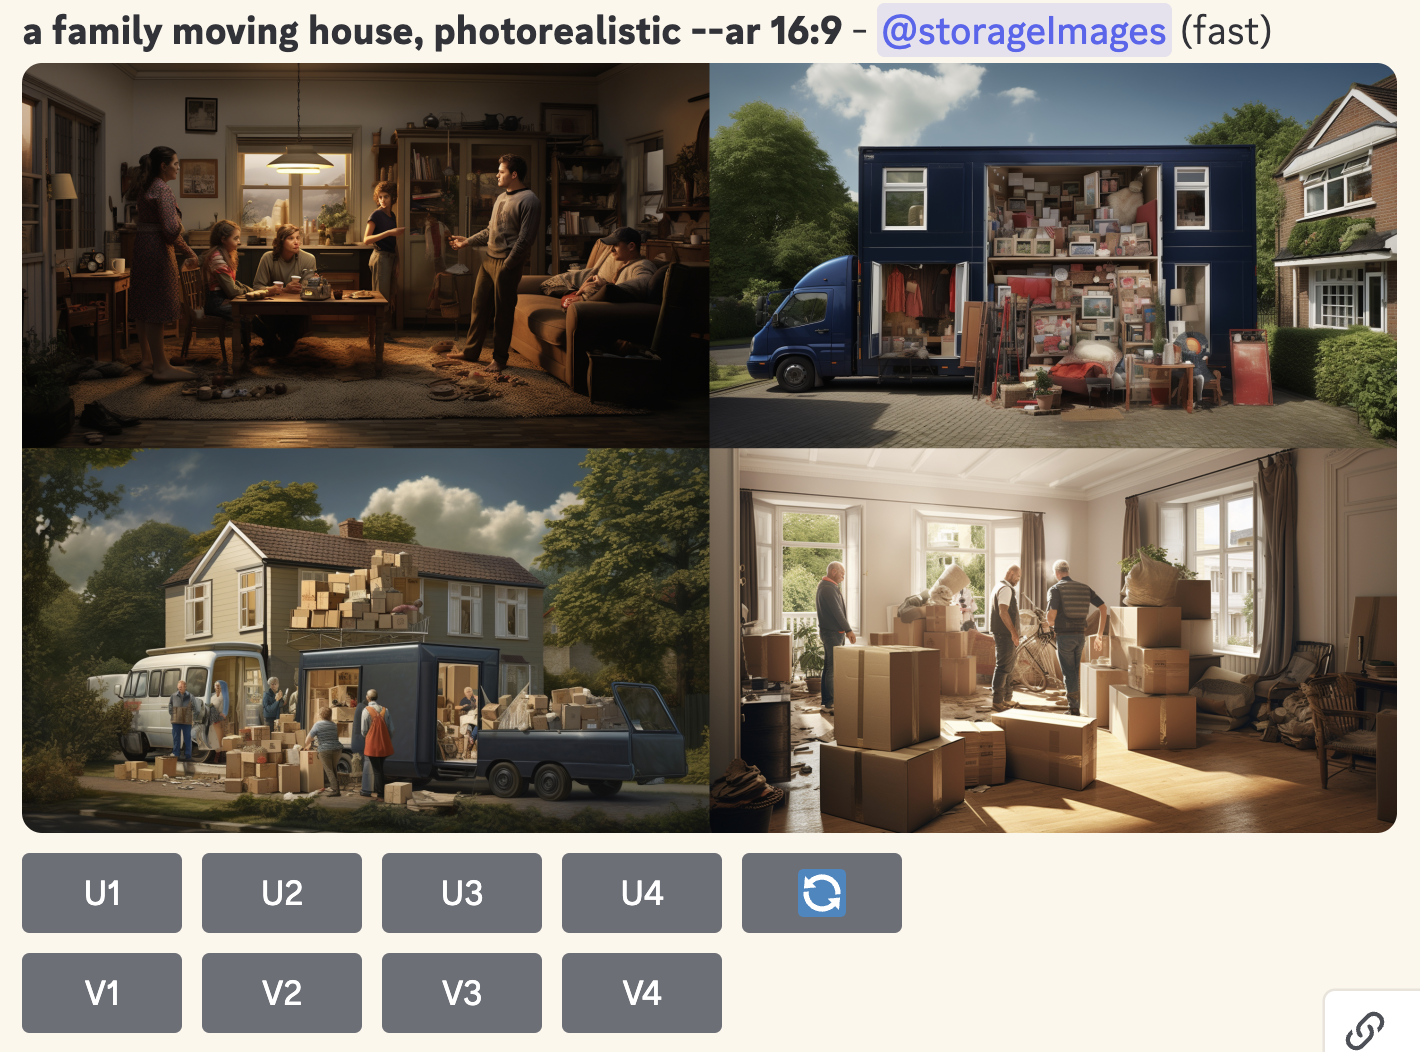
You can start to see here one of the main issues of AI image generation — it can be very hit-and-miss, especially if you’re not providing enough specific information to help it give you something close to what you want. Some of what it may output will be unnatural, as you see here. However, the 4th image here has potential. Let's use it as inspiration, and try a more specific prompt again:
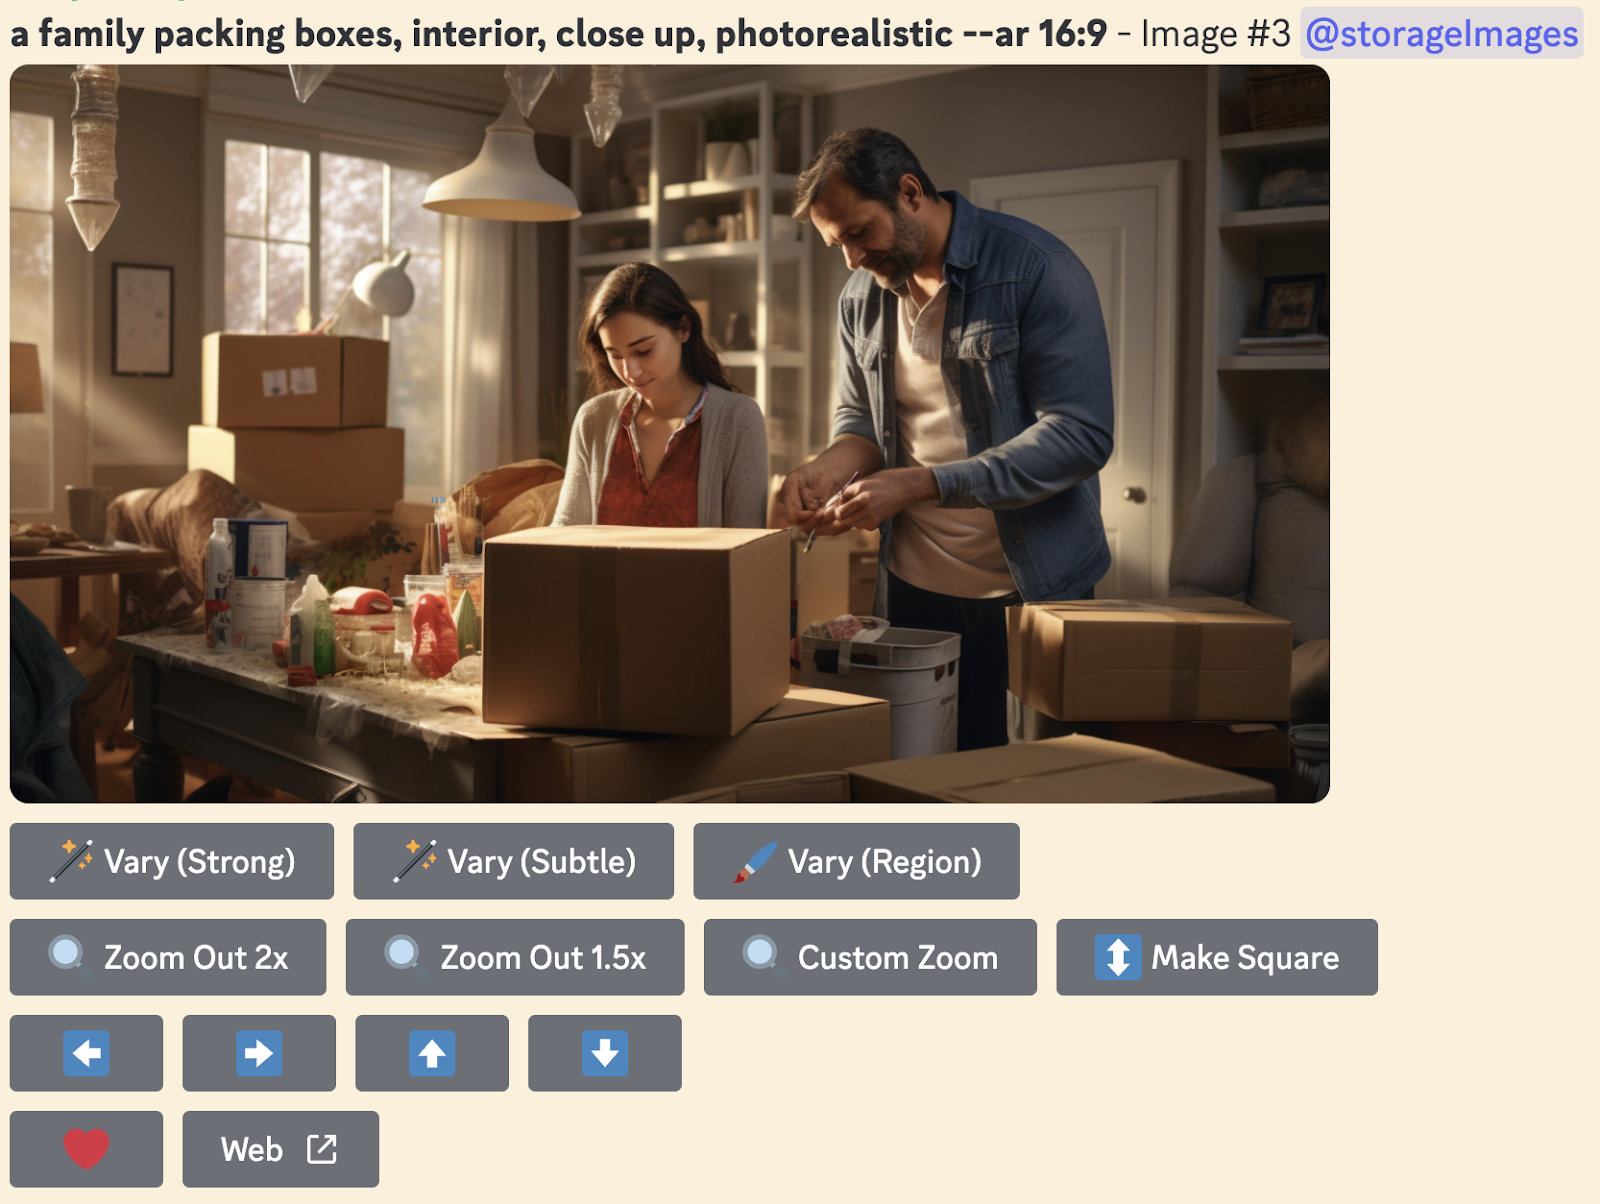
/imagine a family packing boxes, interior, close up, photorealistic --ar 16:9
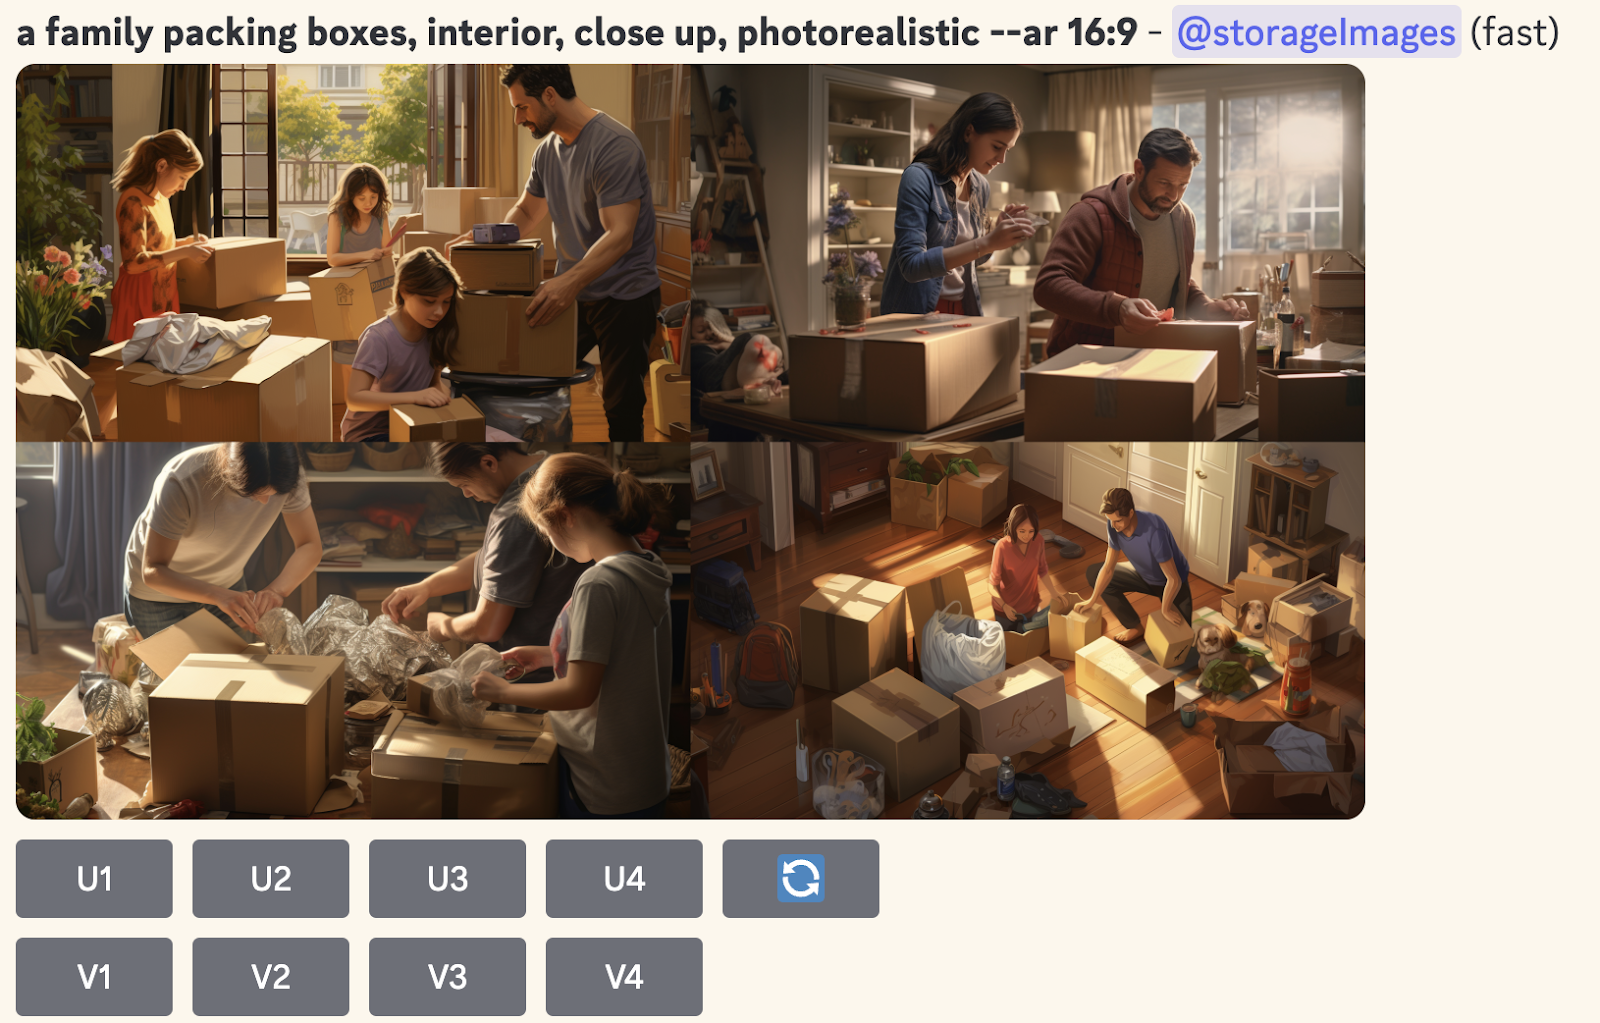
The addition of interior and close up has helped us get much more specific. Some of these images have potential. We can now drill in on a specific image and iterate on it a bit.
When you generate new images, you’ll see grey buttons below them for U1-4, V1-4 and the regenerate icon below it. These mean:
U - Upscale image 1, 2, 3 or 4 in the grid
V - Get 4 new versions of image 1, 2, 3 or 4 in the grid
Regenerate - Give me 4 new images based on this prompt
I like image 2, so let's see what happens if we ask for 4 new versions of it by pressing V2.
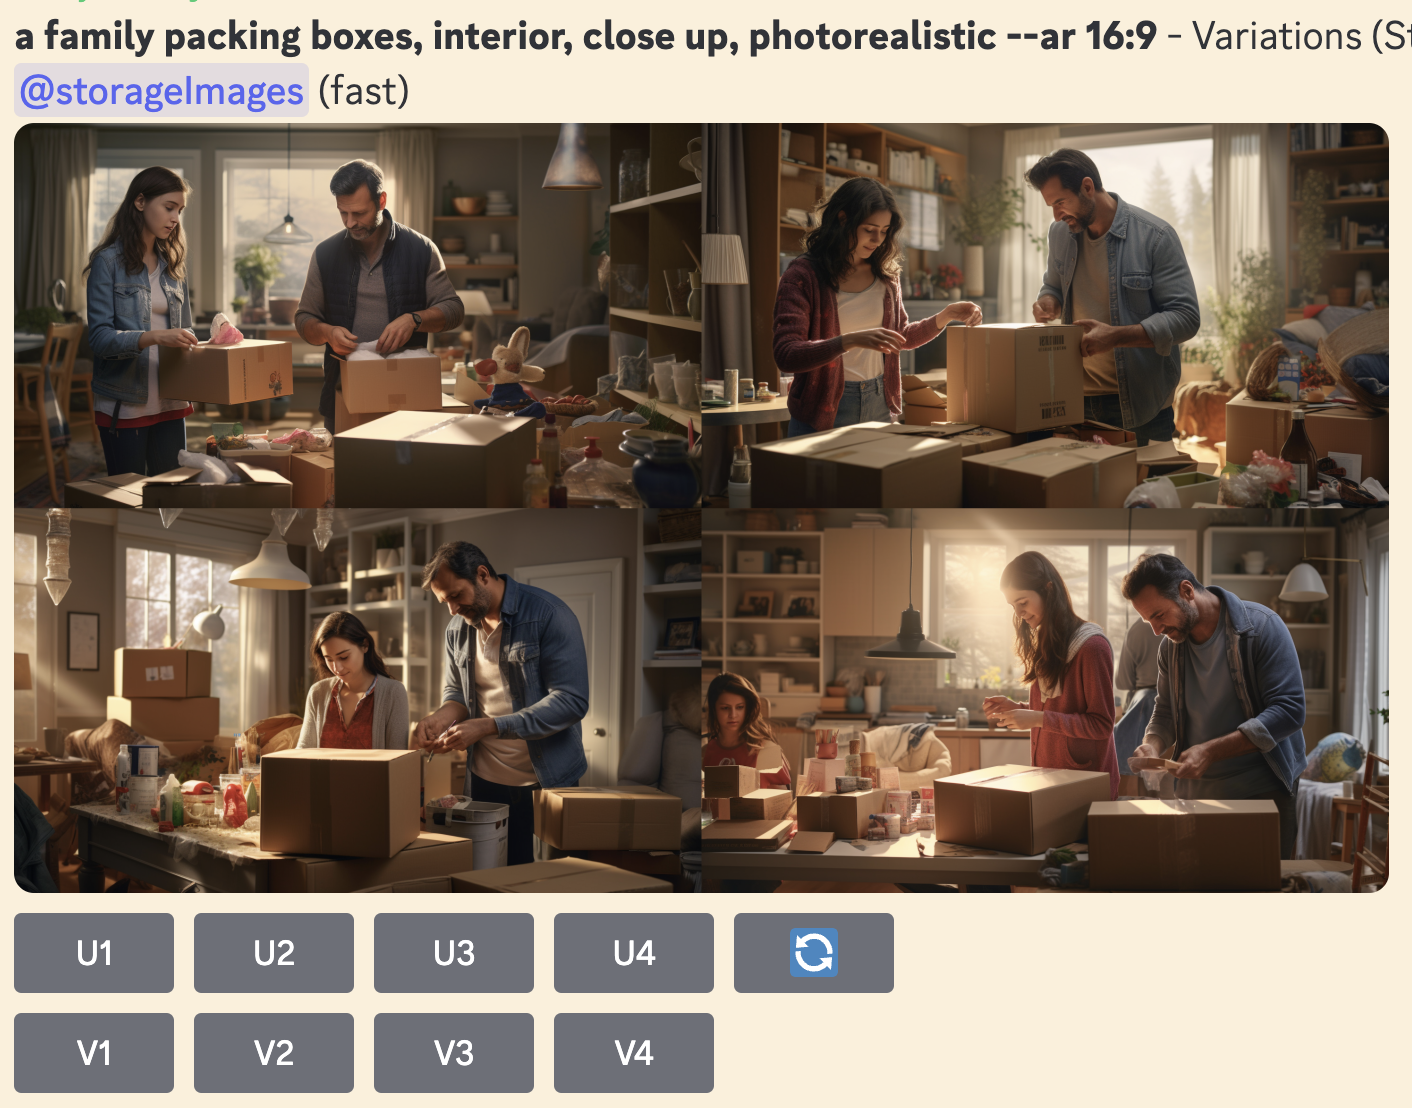
There’s some weirdness going on in some of these. Awkwardly placed hands and floating boxes. You will have to look closely and use your best judgement as to what works. For me, image 3 looks close to what I want. Let's upscale it by pressing U3.
When you upscale, you’ll see a new set of tools:
Vary - Generate new variations of this image
Zoom out - Generate a wider version of this image
Pan arrows - Generate more of this image to the selected side.
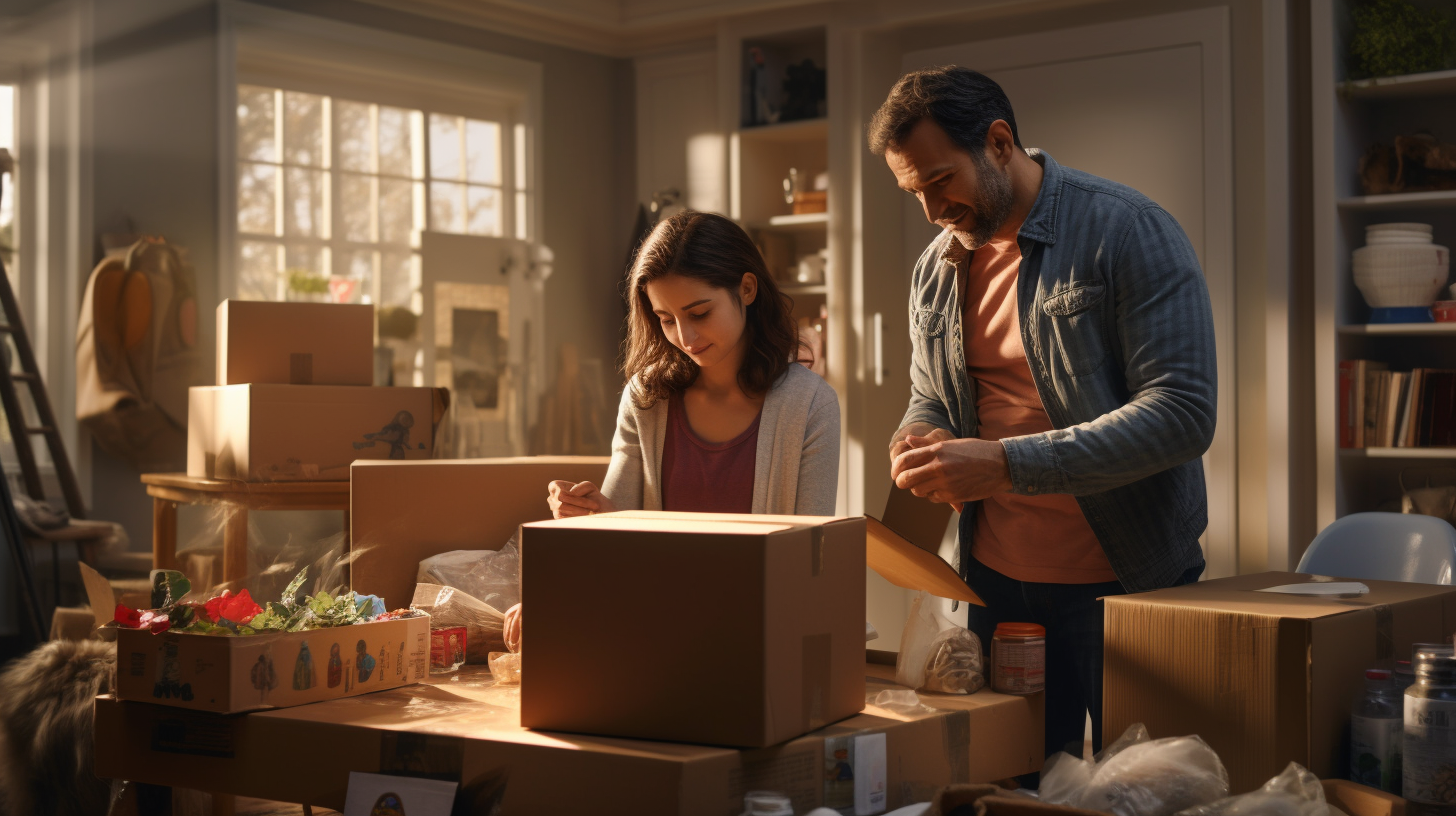
Upon closer inspection of the upscaled image, I’ve noticed the man has a rather strange large hand. So I’ll select Vary (Subtle) to see if I can get something better.
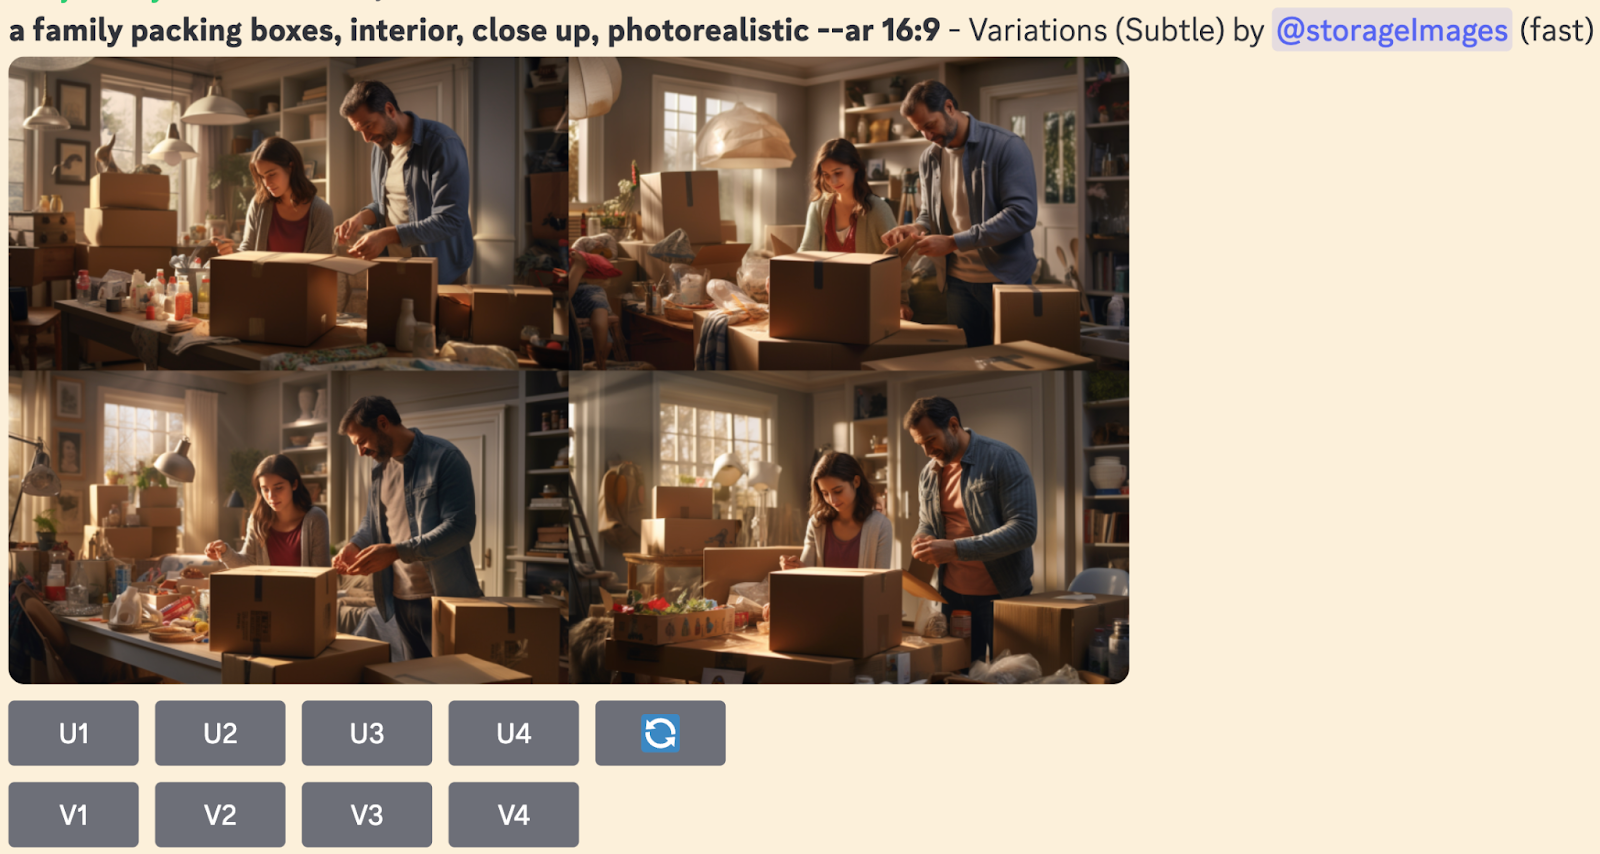
Image 4 is looking pretty good to me, I’ll upscale it.
Upscaled AI generated self storage image
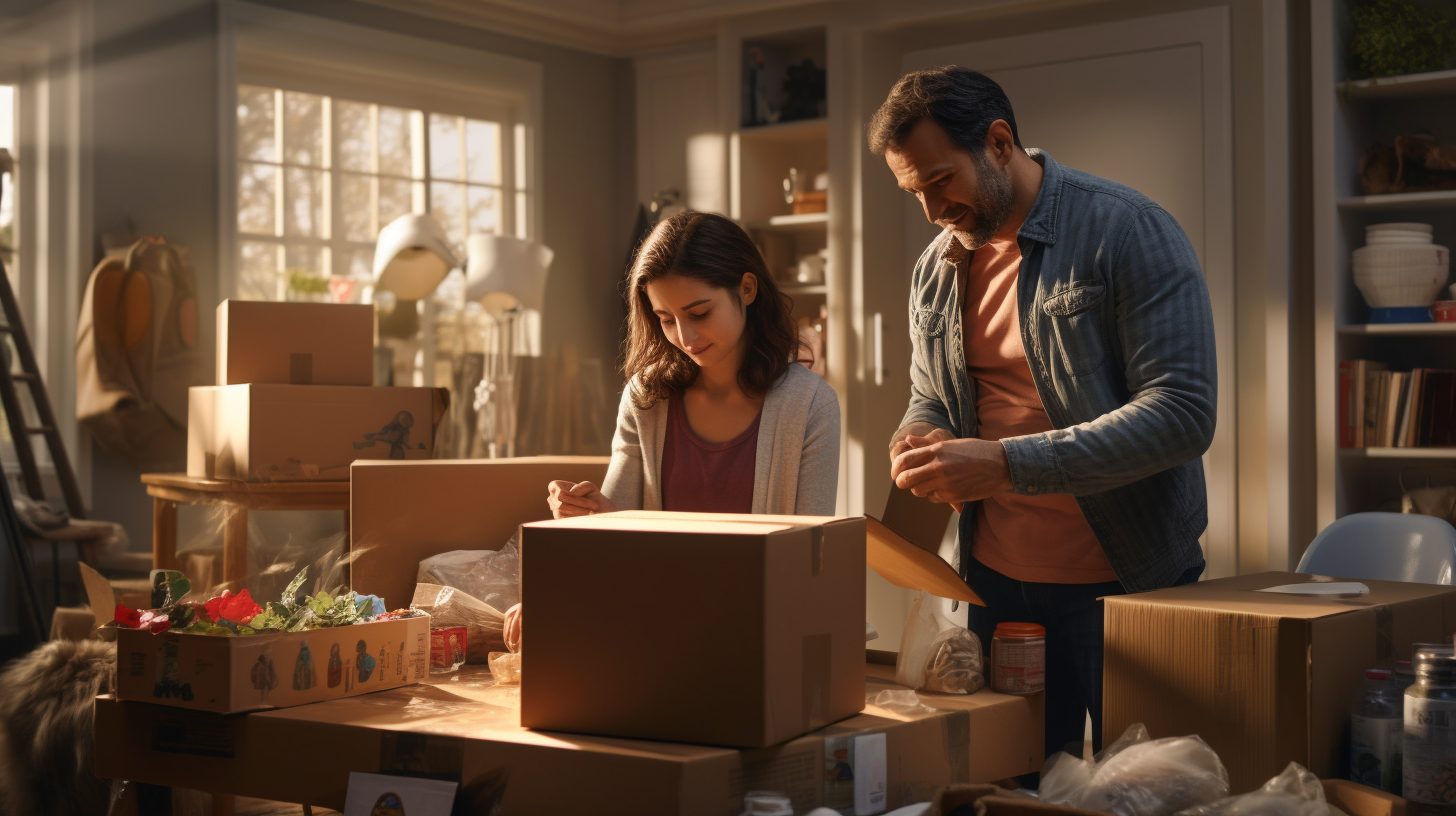
Here’s the upscaled output of this image from Midjourney. It’s looking pretty good if you ask me. Unfortunately, there are still a few bits of weirdness going on, like the lamps in the background.
This is where the Vary (Region) tool comes in handy. Press it and draw around the area you wish to change, then submit.
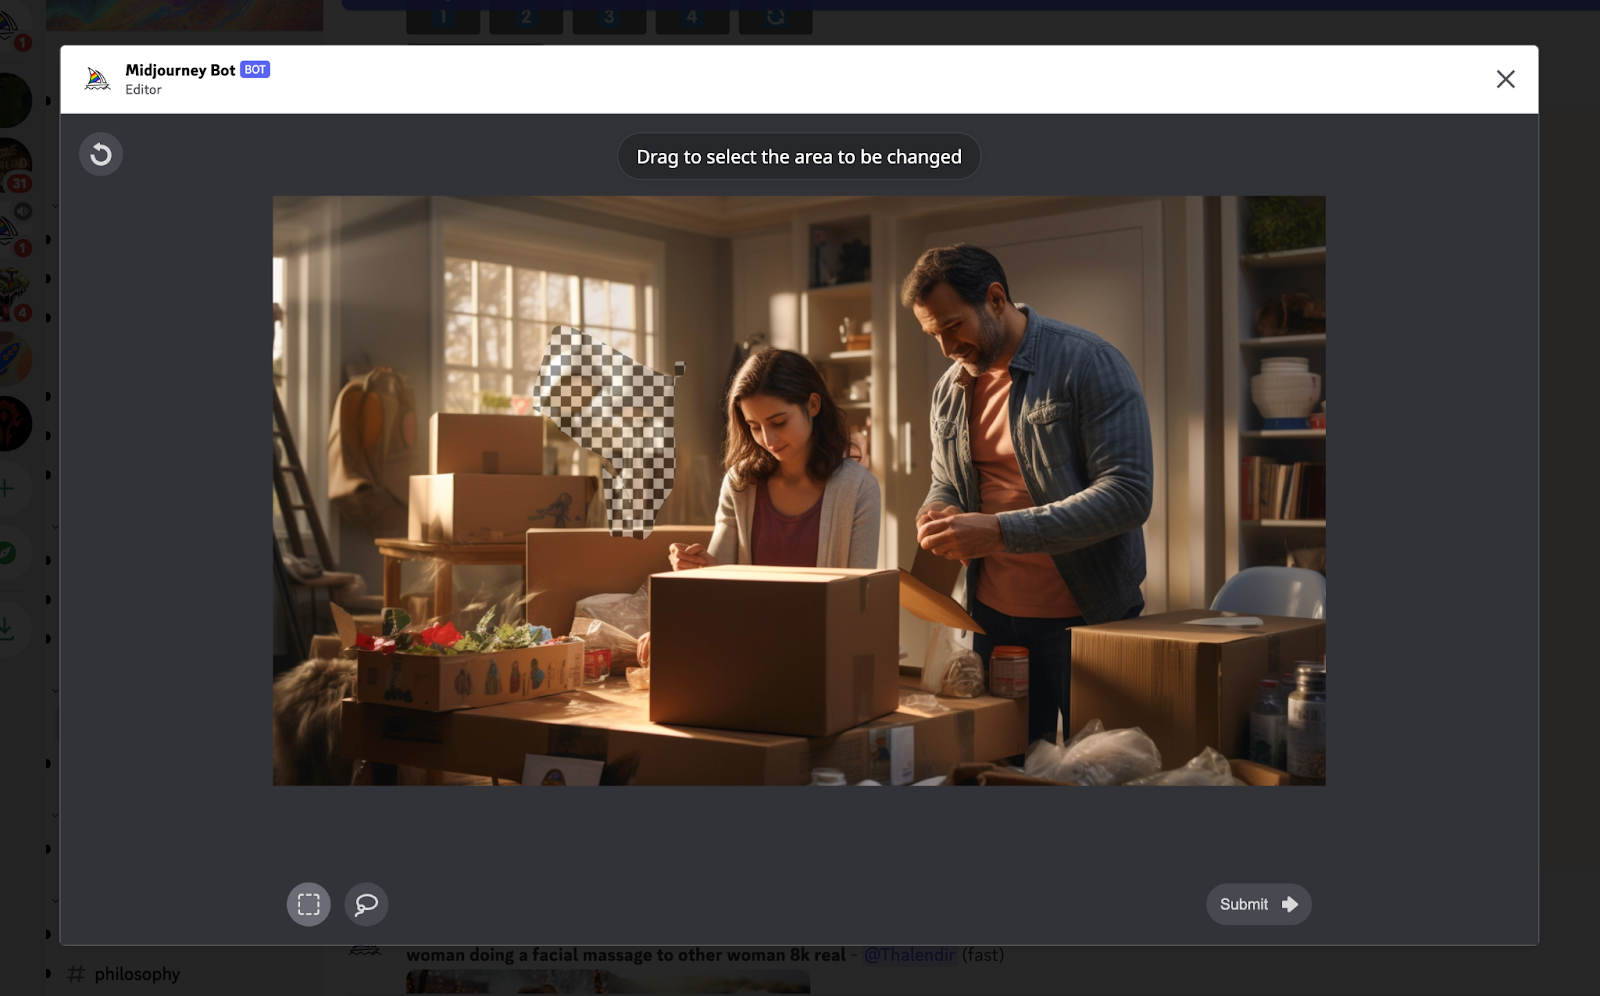
Midjourney will generate 4 images again with something different only in the selected area.
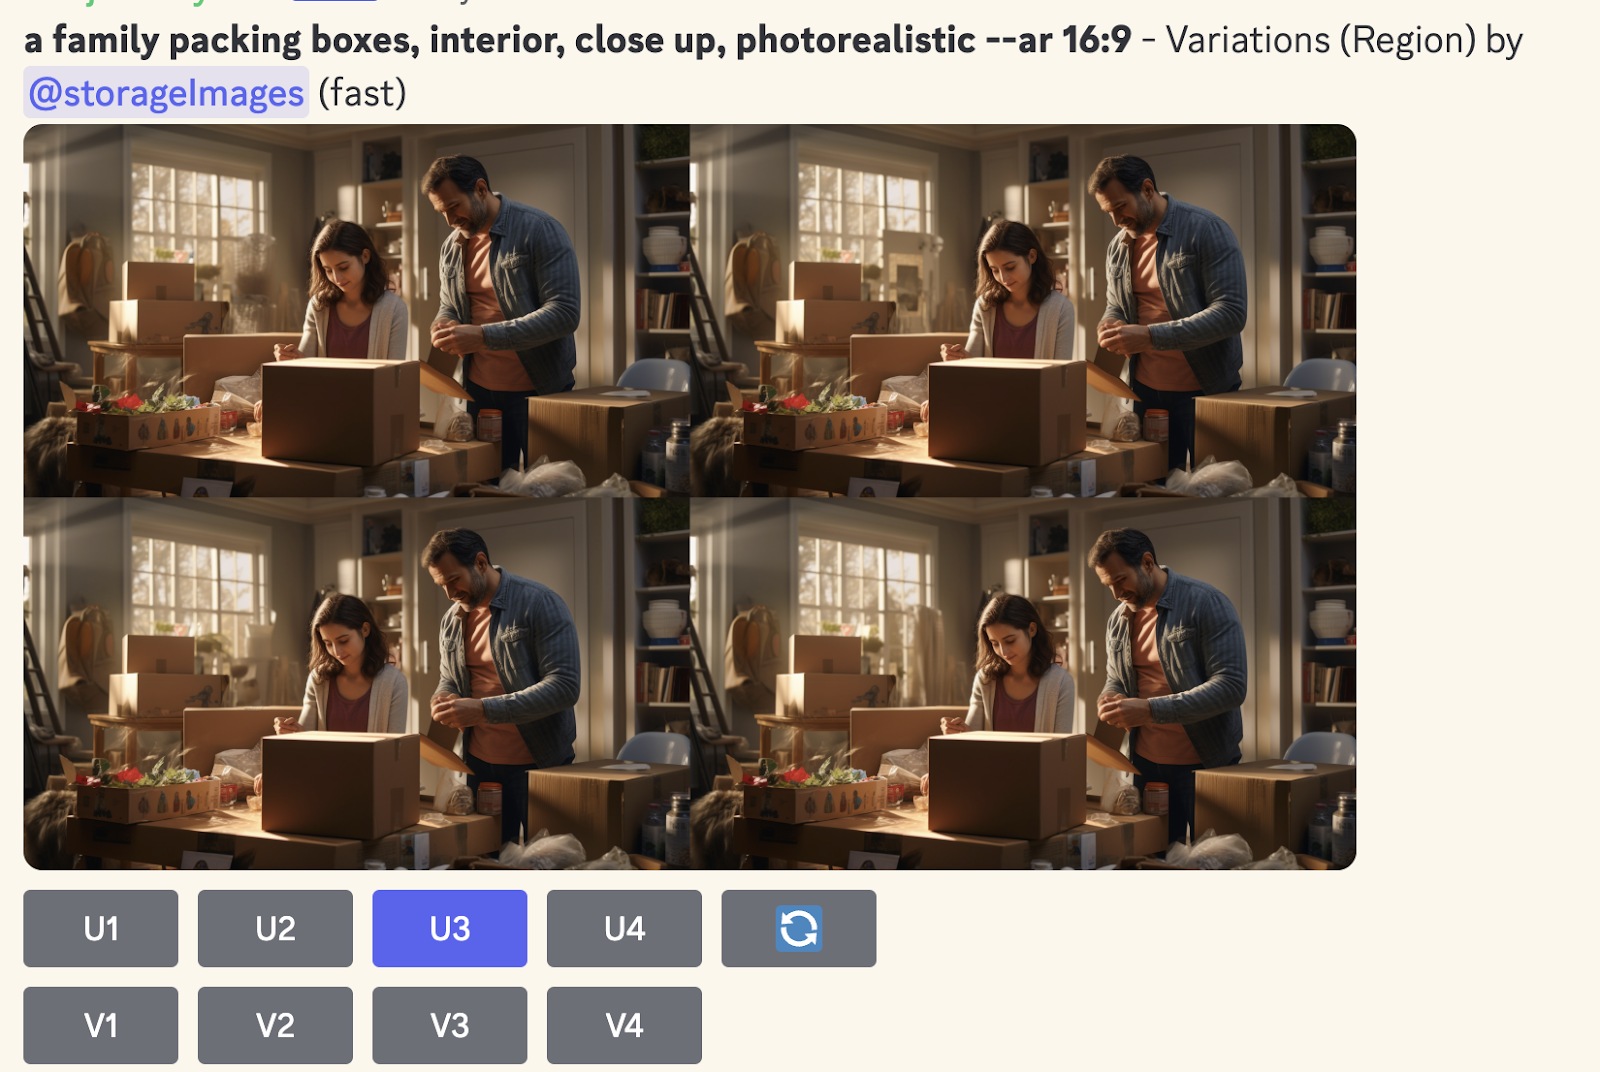
Image 2 looks better to me. It’s not perfect, but I think most people aren’t going to be studying in details the background of this image. So I’ll upscale it. Once done, I can click on it to open a larger version and simple save it to my computer, and we’re finished!
Final AI generated image
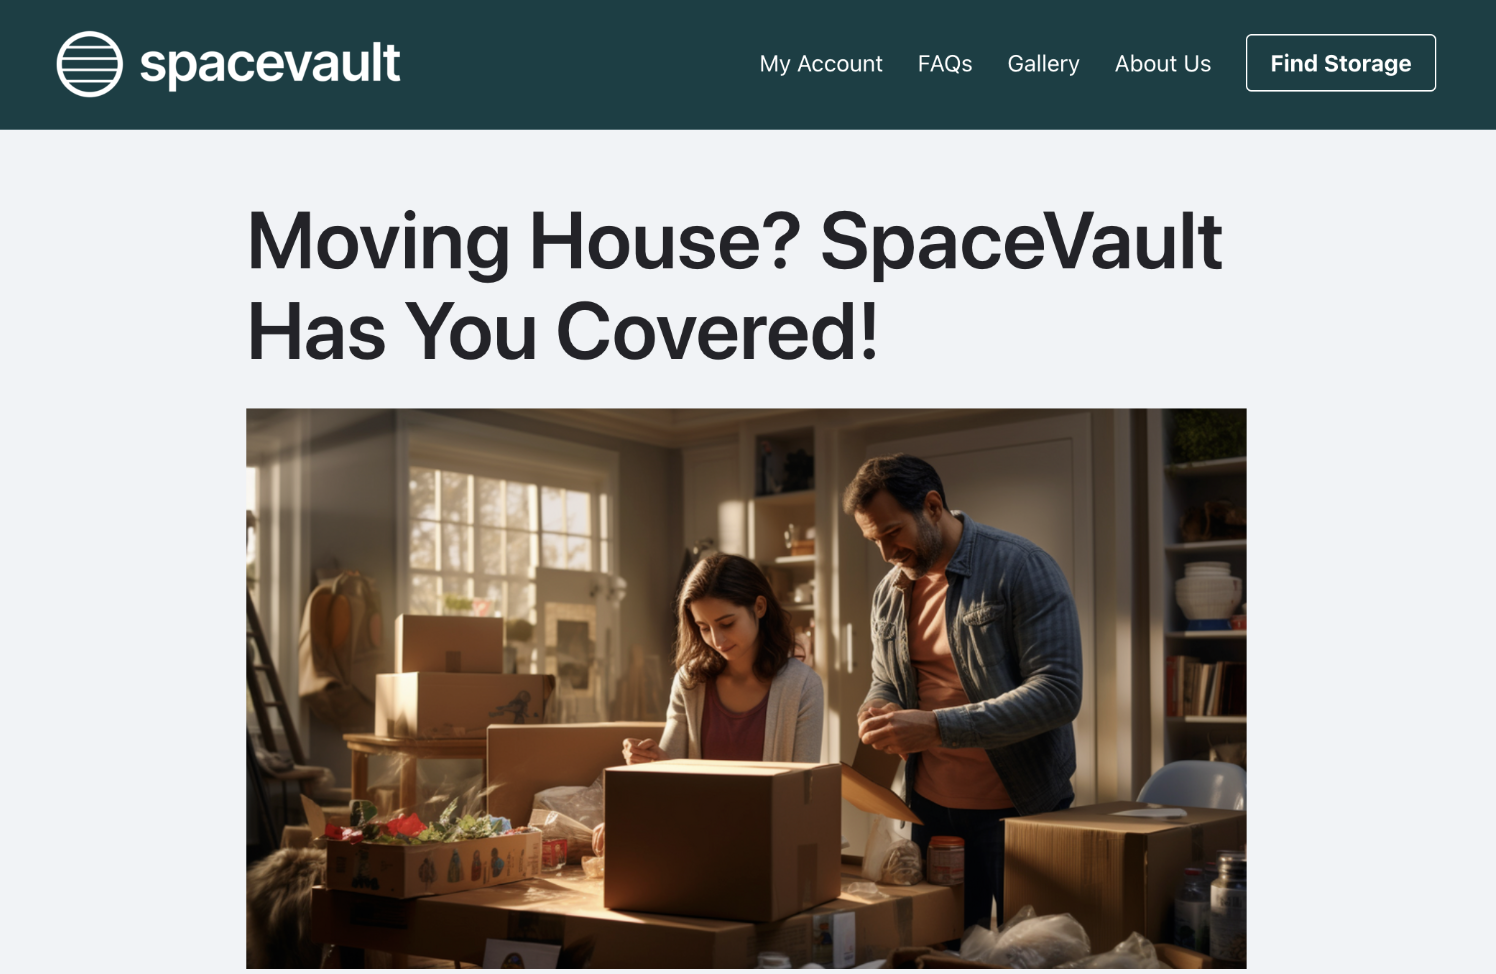
Step 3: Add your image to your self storage website
All that’s left to do is get your image live. I used another AI tool - ChatGPT to quickly generate some Moving House web page content and added it to a page created with the Stora self storage website builder. You can learn how to do this too in our Leveraging AI for Self Storage Website Content guide.
Try it yourself!
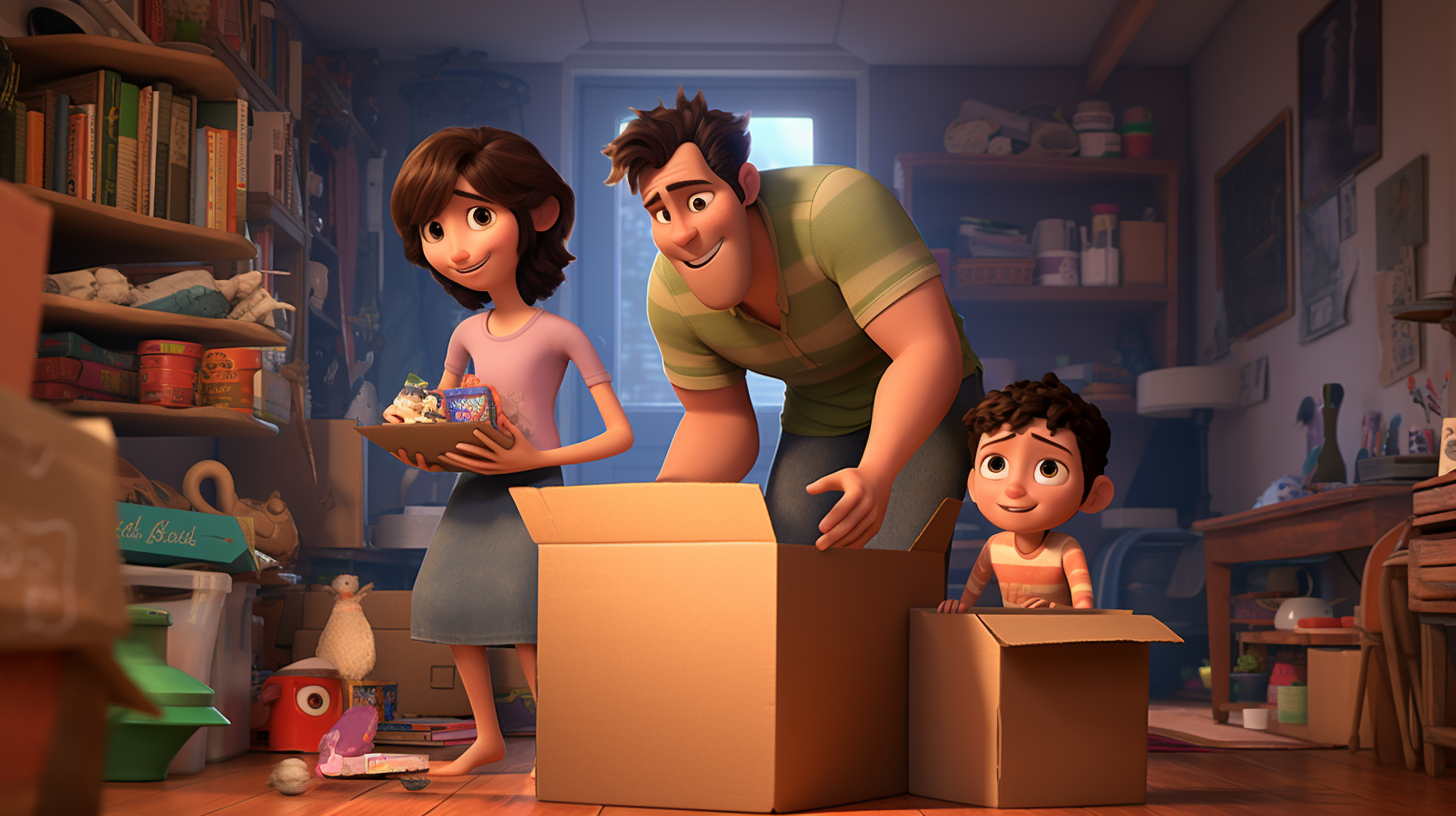
Hopefully, you’re inspired to go try out Midjourney for your own self storage website needs. What I’ve shown you today is what’s possible with just a few simple prompts, but you can get much more specific, generating images of exact visual styles. Part of the fun is in the experimentation, trying different prompts to see what works. One simple word change can open up a whole new world of possibilities. I’ll leave you with an example, changing photorealistic to Pixar style.
Want to learn other ways to Leverage AI in Self Storage?
Read our comprehensive guide on How to Leverage AI in Self Storage Today.
Disclaimer: Tools like Midjourney are evolving rapidly. This guide and output shared from AI tools was created in September 2023. If you are reading this in the near (or far) future, you are quite likely encountering a different experience and better results.

Get self storage growth tips in your inbox
Subscribe to our monthly newsletter to receive expert advice & resources on how to grow your self storage business.